 When attending the JAOO in Denmark, I was amazed by the easy setup of google application engine. There is a good step by step guide to creating a hello world application. It would be silly to recreate that guide here. Therefore this post takes a different approach. I’ll explain what kind of steps you need to take between downloading the SDK and looking at your application online. I’ll also talk about my experiences in getting a somewhat more difficult application running, the actual integration with google docs. How to get a list of all of your documents on the screen?
Read on if your are interested in the possibilities of google apps.
I do want to give a warning, this is my first google apps experience and on top of that also my first Python experience. Do not take this code as a best practice, just learn about the possibilities.
Starting your first google apps engine application starts by downloading the right software and registering. By registering yourself, you get the rights to register and deploy a certain amount of applications. At the time of writing it is ten applications. If you do not want to pay, there are some limitations in the amount of storage that you get and the amount of visits your application can receive. It is a fair way of setting your first steps, I think it will take a while before you reach your limits. Unless you want to store images, documents or videos within your application. If that is what you are up to, you are better of using the other services of google and than integrate with these services. There are apis for google docs, images, mail, calendar and lots of other services. That was one of the reasons I wanted to try this integration.
During the JAOO I followed the following tutorial, it took me around an hour including downloads and uploads. This is a nice way of getting up to speed.
http://code.google.com/appengine/docs/gettingstarted/
Time to introduce my application, I am going to create an application that shows all your documents within google docs. Sounds impossible? Well it isn’t. Let’s start with the basic elements of the application:
- app.yaml – config file of the application redirecting all calls to the mydocs.py script.
- main.css – just like you think, a stylesheets in the static stylesheets folder
- index.html – template file with html and placeholders
- mydocs.py – the python script containing all important code
For now, focus on the python script. The first time I show this code, it contains only the generation of the login or the logout link.
import os
from google.appengine.ext.webapp import template
import cgi

from google.appengine.api import users
from google.appengine.ext import webapp
from google.appengine.ext.webapp.util import run_wsgi_app

class MainPage(webapp.RequestHandler):
  def get(self):

    if users.get_current_user():
      url = users.create_logout_url(self.request.uri)
      url_linktext = 'Logout'
    else:
      url = users.create_login_url(self.request.uri)
      url_linktext = 'Login'

    template_values = {
      'url': url,
      'url_linktext': url_linktext,
      }

    path = os.path.join(os.path.dirname(__file__), 'index.html')
    self.response.out.write(template.render(path, template_values))

application = webapp.WSGIApplication(
                                     [('/', MainPage)],
                                     debug=True)

def main():
  run_wsgi_app(application)

if __name__ == "__main__":
  main()
What can you see in this code? First of all, some imports. We use the users object and the special webapp and a templating engine. Then you see a class called MainPage. This class responds to the root, as is configured in the construction of the application using the special webapp method WSGIApplication. The final part is the actual runner. The MainPage class contains code to check if the current is logged in and it changes the text and the presented link based on this information. You can also see the templating in action. The values are set, then the template file with placeholders is chosen and finally the output is rendered.
If you want to check out the sources of my application, go to my google code project.
http://code.google.com/p/gridshore/
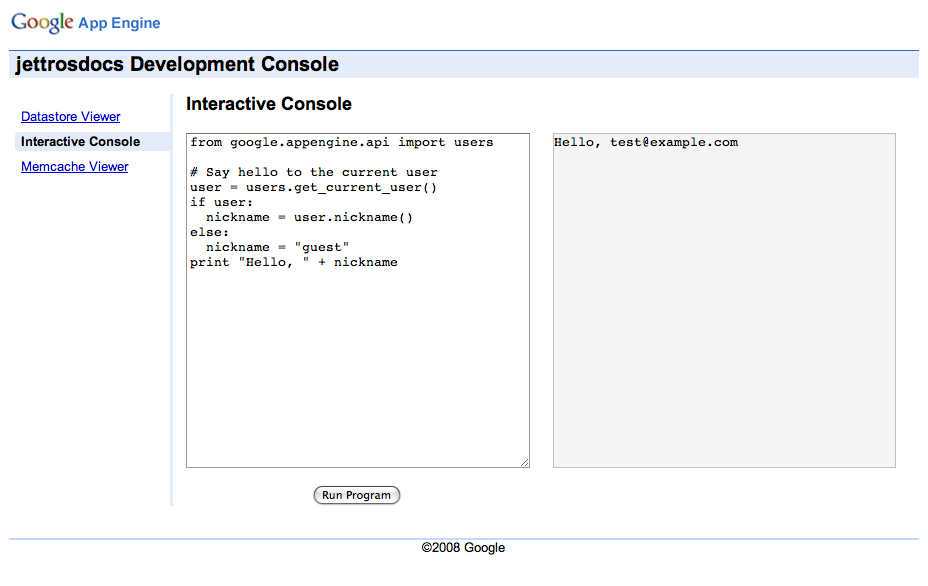
With all the files in place, we can start our first test run. Google provides a test environment, there are some facilities for mocking a login form, the database, and other things as well. Another thing that comes out of the box is a special admin console. Here you can get more information about what happens in your application and you can issue python command in a command line environment.
Run the application using the following command and go to the two provided urls. The image presented is the mentioned admin console.
dev_appserver.py jettrodocs – Starts the developement application server.
http://localhost:8080/ – locally running application
http://localhost:8080/_ah/admin/ – admin console

Now we upload the application for the first time. In the command jettrodocs is the directory that contains all my sources. Therefore you must issue the command one directory higher than your sources.
appcfg.py update jettrosdocs
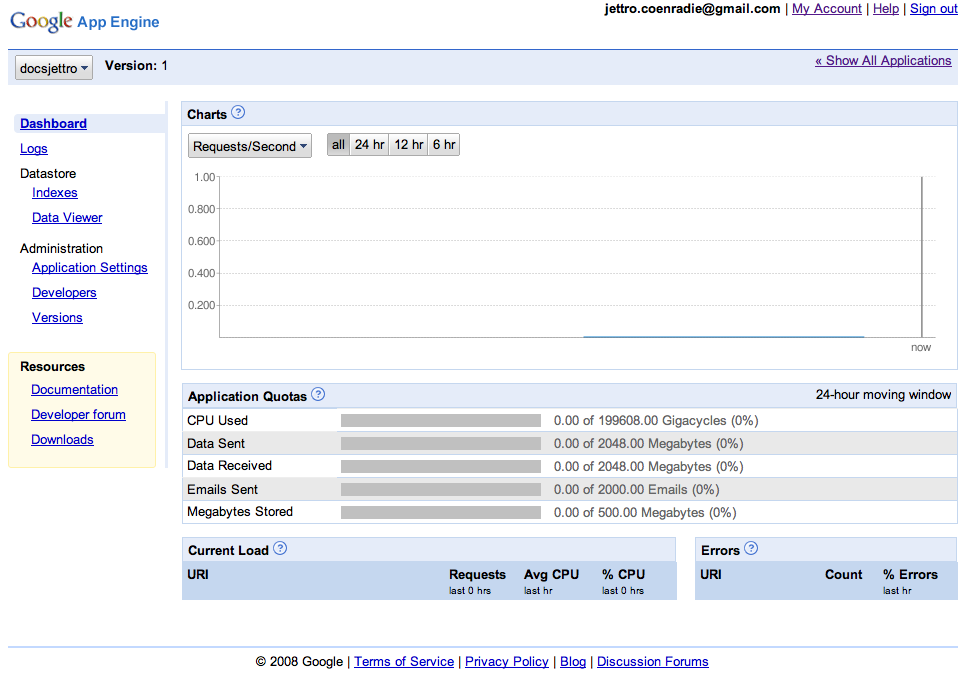
My application is now deployed to the live google environment. Next I’ll give you the url. As a developer of your own applications, you also have access to an online dashboard with all different kind of information about your running application. This is also the place where you can register your application.
http://docsjettro.appspot.com/ – The running application
http://appengine.google.com/ – The dashboard for all your apps

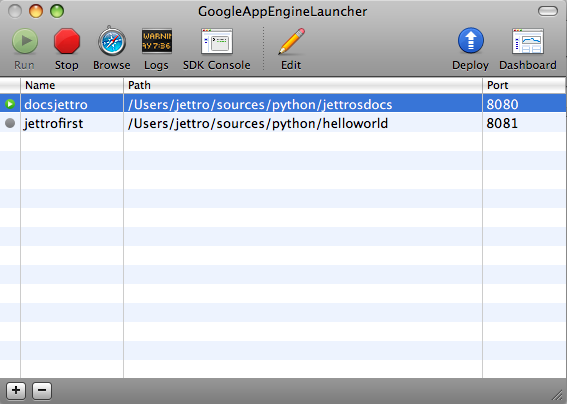
Up till now, I have shown you the hard way of starting the application, uploading your application, typing the url’s to go to your local console and the online dashboard. Basically because I use the terminal for a large part of my day, I feel comfortable with it. There however a nice other way. That is the GoogleAppEngineLauncher. This small app enables you to start, stop, upload your application by pushing some buttons. One nice thing is that you can run your apps on different ports easily, so you can keep on developing them at the same time. The following images gives a screen dump of this google app engine launcher.

The final step is getting the document retrieval working. This turned out to be more difficult than I expected. There is a lot of information to be found on the web, some very good documents as well as nice examples. In the end I managed to get it working. I’ll focus on the bits that were harder for me to grasp. be sure to check out documentation from google. Check the references at the end for a few of the articles I used to get this going.
To be able to connect to google docs api, or feeds, your application needs to be approved by the user that runs it. The whole approval works with a token that is generated and than passed from the authentication service of google to your application. A user gets to see a special google screen that asks him to approve the access to the documents. Next to this approval, the user needs to be logged in as well. So without the user logging in, the application cannot see the documents. By default the mentioned token is only valid for 1 request. There is a mechanism to store the token in the session, that way it will be valid during the complete session.
When the user has authorized the application access to his documents and the user is logged in, the application can do a query for the documents and than print it on the screen.
Time to have a look at the code, for a complete view of the file, please click here. First let’s have a look at the get function that is called when a request comes in. We have seen most of it already, therefore we begin with the new stuff. The following piece of code analyzes the requested url and reads the token as well as the token_scope. To be honest, I think I could have hard coded this token_scope since I am only reading one feed. In the original example you could enter your own feed. Other than that the code speaks for itself.
for param in self.request.query.split('&'):
  # Get the token scope variable we specified when generating the URL
  if param.startswith('token_scope'):
    self.token_scope = urllib.unquote_plus(param.split('=')[1])
  # Google Data will return a token, get that
  elif param.startswith('token'):
    self.token = param.split('=')[1]
Next steps are authenticating the user and checking the session for an existing token. I’ll get back to that later on. Next step is do the actual call to the feed and read the documents from the feed. The feed is called in a separate method. When this method throws an error, the following code reads the error message and stores it in the template values collection. This error handling is done in the following piece of code.
documents=[]
responseMessage = ''
try:
  documents = self.FetchFeed()
except Exception, strerror:
  responseMessage = strerror
Finally the template is filled with values and outputted to the browser. That is pretty straightforward. Next step, the authentication.
def ManageAuth(self):
  self.client = gdata.docs.service.DocsService()
  gdata.alt.appengine.run_on_appengine(self.client)
  if self.token and self.current_user:
    self.UpgradeAndStoreToken()

def UpgradeAndStoreToken(self):
  self.client.SetAuthSubToken(self.token)
  self.client.UpgradeToSessionToken()
  if self.current_user:
    # Create a new token object for the data store which associates the
    # session token with the requested URL and the current user.
    new_token = StoredToken(user_email=self.current_user.email(),
        session_token=self.client.GetAuthSubToken(), target_url=self.token_scope)
    new_token.put()
def LookupToken(self):
  if self.feed_url and self.current_user:
    stored_tokens = StoredToken.gql('WHERE user_email = :1',self.current_user.email())
    for token in stored_tokens:
      if self.feed_url.startswith(token.target_url):
        self.client.SetAuthSubToken(token.session_token)
        return
Here you are introduced with the gdata library. This is a google project to enable developers to easier integrate the google apis using python. You add the required files to your project, check the references for a link to the download and the tutorial. Using this library it becomes easy to add the token to the session, you just call the method UpgradeToSessionToken. The token are stored in the database, that way you can create different tokens for different feeds. Again something I probably could have lived without. Querying for the right token is done in the method LookupToken. We query for the tokens for the current user and look for a token for the requested feed.
Now that we have the token, we can finally call the feed and handle the result.
def FetchFeed(self):
  # The following creation of the client is necessary for the case a client is not authenticated
  if not self.client:
    self.client = gdata.docs.service.DocsService()
    gdata.alt.appengine.run_on_appengine(self.client)

  try:
    return self.ListAllDocuments()
  except gdata.service.RequestError, request_error:
    # If fetching fails, then tell the user that they need to login to
    # authorize this app by logging in at the following URL.
    if request_error[0]['status'] == 401:
      # Get the URL of the current page so that our AuthSub request will
      # send the user back to here.
      next = self.request.uri
      auth_sub_url = self.client.GenerateAuthSubURL(next, self.feed_url,secure=False, session=True)
      raise Exception('<a href="%s">Click here to authorize this application to view the feed</a>' % (auth_sub_url))
    else:
      raise Exception( 'Something else went wrong, here is the error object: %s ' % (str(request_error[0])))

def ListAllDocuments(self):
  feed = self.client.GetDocumentListFeed()
  documents = []
  for i, entry in enumerate(feed.entry):
    doc = Document()
    doc.title = entry.title.text.encode('UTF-8')
    doc.author = entry.author[0].name.text.encode('UTF-8')
    documents.append(doc)
  return documents
The ListAllDocuments method does the actual call and uses the result to create new Document instances that are than provide to the template engine. The FetchFeed function does an interesting thing. It handles exceptions. If the user is not authorized an exception is thrown with a link how a user can authorize the application to read his documents as described before. In case of any other errors, the error is just returned to the screen.
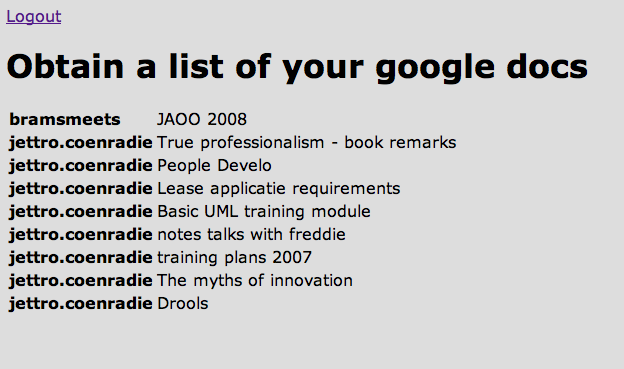
The application is done, you can deploy it using the command line tool or the gui. The actual solution looks like this.

You can try it out yourself here
http://docsjettro.appspot.com/docs
References
- getting started – tutorial walking you through all the required steps to deploy a hello world application
- google docs protocol – manual for the protocol of interacting with documents
- google docs python – Manual for using python to interact with the google doc feeds.
- gdata python client – python client that acts as a wrapper around a lot of different google apis, including google docs and google authentication.
- using the google datastore – manual for using the google datastore from python.
- authentication module – documentation for the google authentication model