
In this blog post I am writing down the steps I took to create a new grails application. Maybe it can be of help to other that want to start using grails.
In short I am going to create an application that you can use to schedule people on projects. We used to have an excel sheet to do this, but I really do not like this. So I am writing an application for it. Grails is ideal for these kind of projects.
I am, of course, going to use some nice grails plugins, I will mention them all and give some details about the steps I took to make them run. Some of the plugins are:
- DBUtil
- Navigation
- grails-ui
- joda-time
Comments, questions and feedback are of course welcome.
First steps
A grails application starts with creating the application. For some reason I still like to do this on the command line. I do not use the excellent intellij to do this. But I will use it extensively for the remainder.
grails create-app MyScheduling
Next step is adding it to a source repository. I am getting more enthusiastic about using git, so I create a repository at github. You can find my sources here:
http://github.com/jettro/MyScheduling
One of the things I like about git is the .gitignore file. A very clean way to prevent certain files from being added to the repository. The following shows the contents of my .gitignore file.
# used to ignore certain files by git
# mac osx files
.DS_Store
# intellij files
.idea/*
*.ipr
*.iws
# (grails) generated files
target/*
out/*
stacktrace.log
enough about git, let us move on to the nice parts about grails.
Starting with the domain
At the beginning I start with only a few domain classes.
- Person – the people we want to schedule on projects
- Project – well it is a project
- User – the ones that actually are allowed to use the application
There is not a lot of information in these domain objects for now. I use intelllij to create the domain classes, but command is easy as well, grails create-domain-class nl.gridshore.scheduling.PersonThere is a many to many relationship between projects and persons. I also created the controllers for the three domain classes with just one line of code in each class.
def scaffold = true
This line makes all the views available, you can now start the application and browse to the homepage. I use intellij to start the application but grails run-app will work fine as well.
THe following is a tip that you can use when creating your domain model.
DBUtil plugin
this plugin can be used to look at the data and the datamodel of an in memory database, which is the default for new applications. To me this is a must have plugin.
grails install-plugin db-util
Navigation
I make use of the navigation plugin, you can find the information about the plugin here:
http://www.grails.org/Navigation+plugin
We start of by introducing the navigation to our won (non-scaffolding) controllers. So we create a HomeController. Next we tell the navigation plugin to include the home controller in the navigation. We have to add one line to the controller.
static navigation = true
Yep, it is that easy. We also need to create the index.gsp in views/home. Now enrich our template with the navigation component, therefore we open up the main.gsp in views/layouts. There is two things we need to do, first add a header part to include styling and scripts. Then we add a div with the menu elements.
<html>
<head>
  <title><g:layoutTitle default="Grails"/></title>
  <link rel="stylesheet" href="${resource(dir: 'css', file: 'main.css')}"/>
  <link rel="shortcut icon" href="${resource(dir: 'images', file: 'favicon.ico')}" type="image/x-icon"/>
  <g:layoutHead/>
  <nav:resources group="tabs"/>
  <g:javascript library="application"/>
</head>
<body>
<div id="spinner" class="spinner" style="display:none;">
  <img src="${resource(dir: 'images', file: 'spinner.gif')}" alt="Spinner"/>
</div>
<div id="grailsLogo" class="logo"><a href="http://grails.org"><img src="${resource(dir: 'images', file: 'grails_logo.png')}" alt="Grails" border="0"/></a></div>
<div id="menu">
  <nav:render/>
</div>
<g:layoutBody/>
</body>
</html>
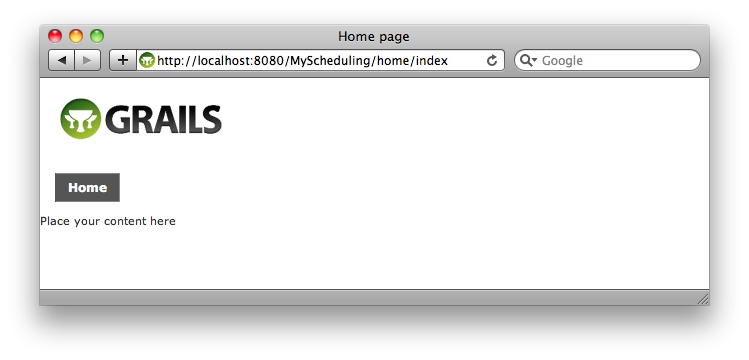
If you are following along and you are like me seeing an almost white page without any navigation what soever, check if you have added the meta tag for sitemesh to your gsp. Go to our homepage or to the url: http://localhost:8080/MyScheduling/home. You should now see the following screen:
Of course we also want to be able to create persons from the home page controller. So we add other controllers to the menu as well. Let us start with the person controller. In my first try the Person button was placed before the Home button, that is not what I want. So we add ordering to the menu. This can be done by assigning an array with configuration options to the static navigation declaration. As you might have expected, the name of the property to configure is called order.
Next up is subnavigation, let us add a submenu item for adding a new person. The following code shows how to do just that.
static navigation = [group:'tabs',order:10]
We now need to add the generation of the submenu to our template as well. Add the following line to the main.gsp right belof the nav:render tag.
<nav:renderSubItems/>
And the subnavigation for person becomes
    static navigation = [
            group:'tabs',
            order:150,
            title:'person',
            subItems:[
                    [group:'tabs',action:'create',title:'create']
            ]
    ]
The following screen is the result:
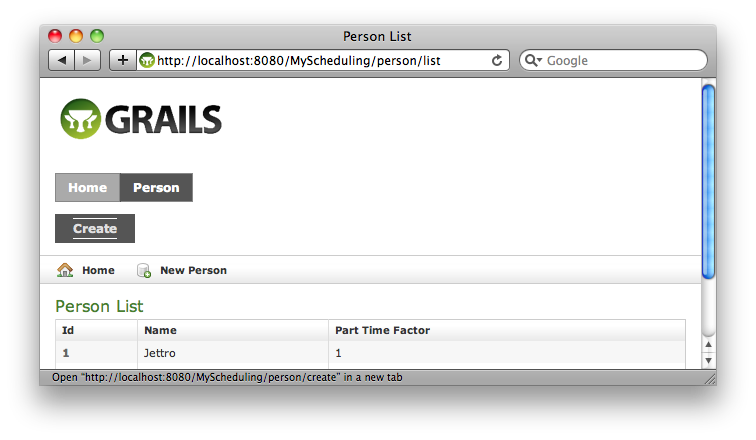
As you can see, we have the default scaffolding buttons as well, so we have to remove the navigation from the scaffolding screens. More on that later, for now I want to add one latest thing and that is i18n messages or labels. This is not the easiest thing, you need to use the groups thing or it won’t work. But other than that it is again pretty painless.
Let us move on to the next topic, more ui, we will continue with the grails ui plugin
The grails-ui plugin
The grails ui plugin contains a lot of different ui components. For now we focus on the autocomplete component, the date picker and the datatable component. We are going to create a screen that accepts a start date, an end date, and the amount of hours per week for a certain person and project. The person and project will use the autocomplete component and the date will use the date picker. Finally all the created ScheduleItems will be presented in a data table. First we install the grails ui plugin. I think you know how by now. If you are using intellij on the mac command+option+k.
Before this to be created screen has use, we need to introduce a few new things. We create a new domain class ScheduleItem with the week number, the amount of hours per week and of course the project and the person. Then we also create a service to create a schedule item, the ScheduleItemService. Of course we also need the controller to present the data and accept the form.
Before I start introducing the gui components I want to stress that you must not forget to add the following tag to each header of the page with the components you use on that page.
<gui:resources components="dataTable,autoComplete,datePicker"/>
The datatable component
This component consists of a controller component and a tag for a gsp page. The controller component is called using an ajax request and returns JSON. Things like filtering and pagination are supported out of the box thanks to the very easy grails way of doing queries. The following code block shows the controller code.
def scheduleItemDataAsJSON = {
def list = []
def allItems = ScheduleItem.list(params)
response.setHeader("Cache-Control", "no-store")
allItems.each {
list << [
id:it.id,
person:it.person.toString(),
project:it.project.toString(),
weekNr:it.weekNr,
nrHours:it.nrHours
]
}
def data = [
totalRecords: ScheduleItem.count(),
results: list
]
render data as JSON
}
[/sourcecode]
<p>As you can see in line 3 we use the gorm stuff to query the ScheduleItems. Than we create the list with items, check that we actually return the nested properties for person and project. If you forget to do this you will see something like [object Object] in the table. Finally we prepare the data object with the list of items an a count of the total items. This data is than returned as JSON.</p>
<p>Next up is the gsp part, the following code block shows the dataTable in action. I do want to explicitly tell you not to forget to add a component (div or the body) with the class yui-skin-sam. This is a requirement for the components to work. The total code than becomes.</p>
[sourcecode language="xml"]
<div class="yui-skin-sam">
<gui:dataTable
id="scheduleItemDatatable"
draggableColumns="true"
columnDefs="[
[key:'id', sortable:true, resizeable: true, label:'ID'],
[key:'person', sortable:true, resizeable: true, label:'Person'],
[key:'project', sortable:true, resizeable: true, label: 'Project'],
[key:'weekNr', type:'number', sortable:true, resizeable: true, label: 'Week Nr'],
[key:'nrHours', type:'number', sortable:true, resizeable: true, label: 'Nr Hours']
]"
paginatorConfig="[
template:'{PreviousPageLink} {PageLinks} {NextPageLink} {CurrentPageReport}',
pageReportTemplate:'{totalRecords} total records'
]"
controller="scheduling"
action="scheduleItemDataAsJSON"
resultsList="results"
rowExpansion="false"
rowsPerPage="15"/>
</div>
The code is pretty easy to understand, check the controller and action method. The following screen dump shows the result.

Autocomplete
In the overview screen of ScheduleItems we push the create button. In that screen we have the autocomplete and the datePicker. The datepicker is so easy I will not really go into it. Let us focus on the autocomplete. Again we have a controller part and a gsp part. I have taken the easy way, I provide all options from the controller. Using ajax is almost the same idea as the dataTable component. Still I want to limit these kind of requests. The following code block shows the controller to provided the options for the autocomplete.
def create = {
def persons = Person.list()
def projects = Project.list()
[projects: projects, persons: persons]
}
Now we have all the persons and projects available in the gsp view component. The code is pretty easy when not using ajax.
  <div style="width:300px">
    Person : <span class="yui-skin-sam"><gui:autoComplete id="person" options="${persons*.name}"/></span>
    Project : <span class="yui-skin-sam"><gui:autoComplete id="project" options="${projects*.name}"/></span>
  </div>
The following image shows the form, yes I know, I need to spend time on the layout of the screen.

For accepting the form submission we also need some code. The next code block shows the code that reads the form and calls the service.
    def newScheduleItem = {
        def personName = params.person
        def projectName = params.project
        def nrHours = params.nrhours.toInteger()
        def weekNr = params.weeknr.toInteger()

        flash.message = "New item is created for person ${personName} and project ${projectName}"
        scheduleItemService.createScheduleItem(personName, projectName, weekNr, nrHours)
        redirect(action: "create")
    }
That is it for the grails-ui plugin, let us move on to the next plugin.
Joda time
Groovy comes out of the box with a better Date object than standard java. Still joda time is the way to go. Therefore we will introduce the joda time plugin. One of the reasons I need it, is that I want to work with week numbers. Joda time has out of the box support for this. So we install joda time.
For persisting dates, we need to tell grails to use the special joda time versions. Therefore we need to add special config lines to the Config.groovy.
grails.gorm.default.mapping = {
   'user-type' (type: PersistentLocalDate, class: LocalDate )
}
If you have dates in your domain objects and you use scaffolding, you need to change the scaffolding templates so joda time will keep on working. The following command does just that.
grails install-joda-time-templates
Now let us try to use the startDate and endDate in the SchedulingController to create entries for every week in that period. For that to work we must make a change in the interface of the service. We now use LocalDate from joda time. We also change the input field of the datepicker. We add the attribute formatString. That way joda time can very easily convert the string into a real LocalDate.
The important part in the SchedulingController is converting the strings into dates.
def startDateStr = params.startDate
def endDateStr = params.endDate
if (startDateStr &amp;&amp; endDateStr) {
LocalDate startDate = new LocalDate(startDateStr)
LocalDate endDate = new LocalDate(endDateStr)
scheduleItemService.createScheduleItems(personName, projectName, nrHours,startDate,endDate)
} else {
}
The last part is the service that actually calculates the weeks. Before hand I warn you that this code is not optimal yet. You cannot pass the year with the weeks. If someone has a smarter way of doing this, please comment or make a suggestion using mail, github or using other means.
def currentDate = startDate This blog post is reaching it’s end. Not that I am done, I will write more posts the coming weeks. The final thing I want to show is something weird with the home page. At the moment pages cannot deal with not having navigation configured. Therefore the default homepage is broken. I want to use this to show you how you can change the mapping to the default homepage. I want to show the /home as the default page. To do just that we need to change the mapping. Open the UrlMappings in the conf folder. Look for the mapping of “/” and change that line into the following line: I am still pretty amazed ahout how easy it is to work with grails. What I have done so far took me about 6 hours. In that time I also wrote this blog post. Not bad for someone that does not have a lot of experience with grails. In my next blog posts I will go into the security part, validation, google charts and searchable plugin. Hope you liked it and hope to see you back.
for (int i=startDate.weekOfWeekyear;i
"/"(controller:"home", action:"index")