Introduction
For almost half a year now, I’ve been the proud owner of a Samsung Galaxy SIII Mini (bought it just before the release of the S4, because my phone died and I couldn’t wait for the S4). Since then I’ve got it doing most of what I want it to do, except sign my outgoing emails when I want it to (sign them cryptographically, obviously — I got it to add a text signature within two seconds). The problem here is that setting up the Samsung stock mail app (I don’t use the GMail app) is not immediately obvious. But today I finally got it working, after a long and frustrating day. Read on to find out how…
To sign or not to sign…
First of all, let’s take a look at the basic infrastructure for securing your outgoing mail in Samsung’s mail client. This infrastructure is found in the mail application’s settings, which are accessed using the menu key once you start the mail client:
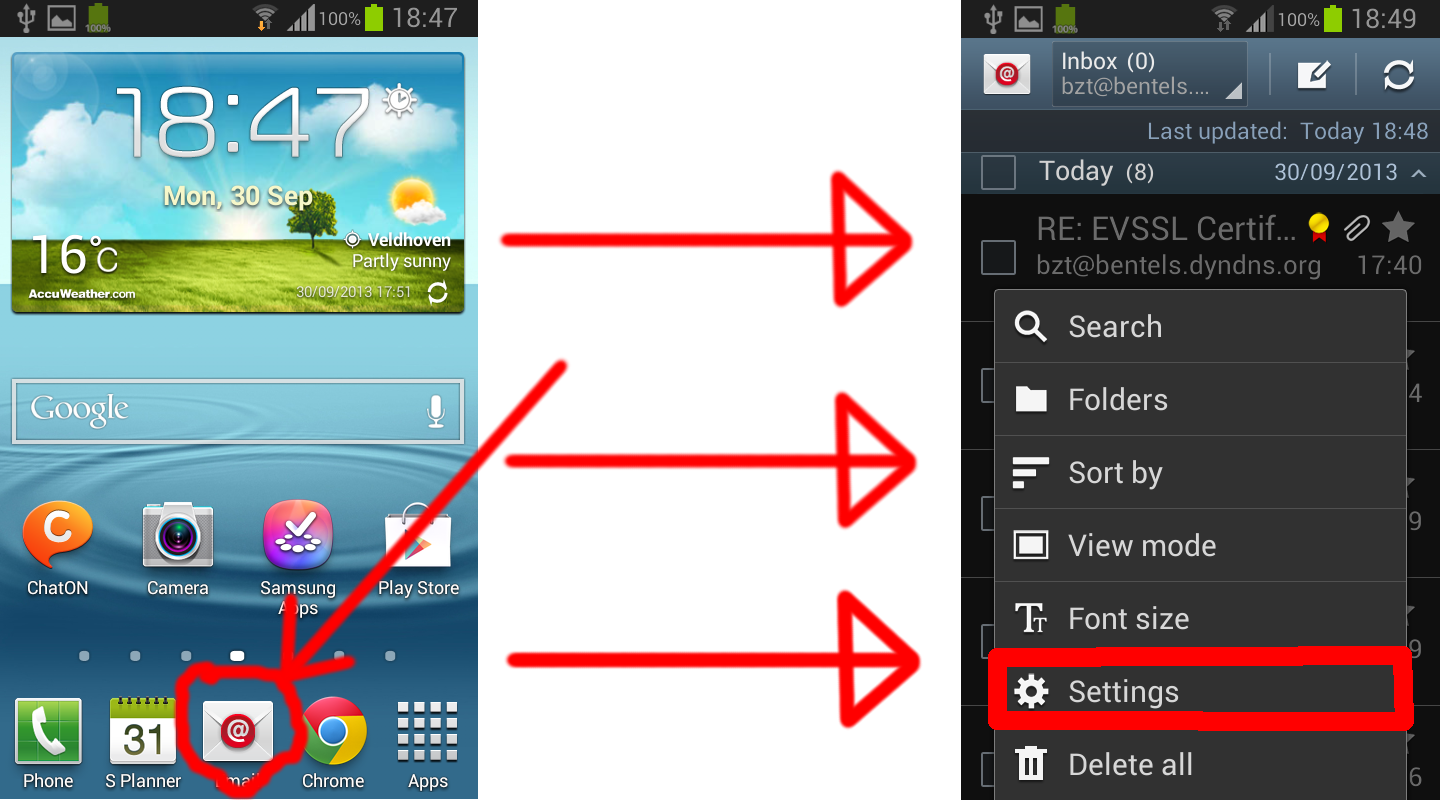
After you access the settings, find the security options item and tap that:
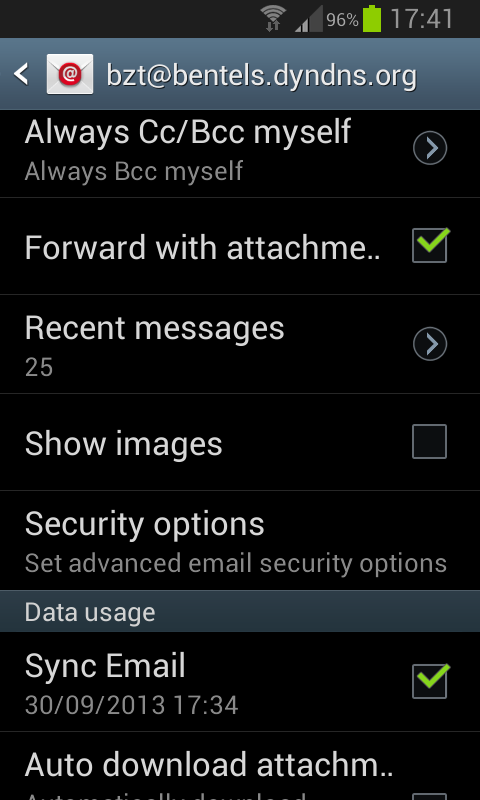
You should now see a screen like this:
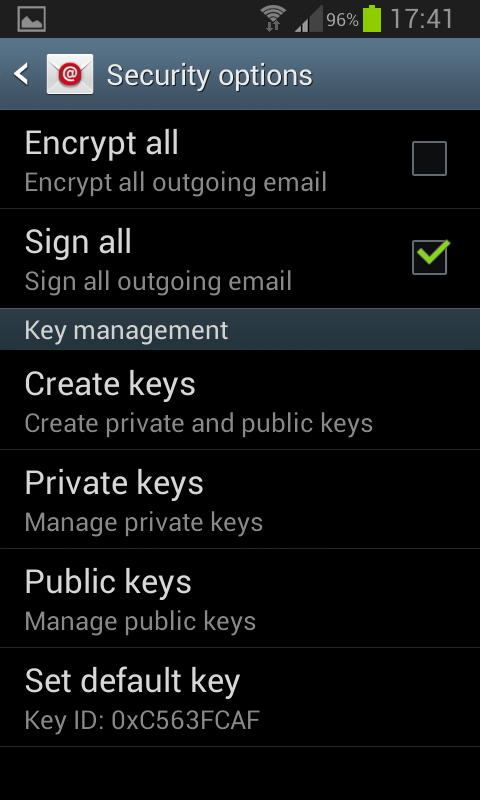
Hooray, you can manage keys that allow you to sign and/or encrypt your mails!!
But this is where things start to get awkward. There are two competing standards out there (both endorsed by the IETF) for signing and encrypting mail. First, there is S/MIME, which uses the same PKI interface also used to secure web traffic and which requires yu to use RSA keypairs and signed certificates. On the other hand there is Pretty Good Privacy (PGP) which uses many types of keypairs, keyservers and a web of trust. So the first question that you run into here is: which do you use? The answer to that is that you use PGP, because S/MIME is not supported by this mail client except for Exchange servers. But you have to dig long and hard on the web to find that out, because there is no official documentation to tell you that.
So your next move is going to be to use a tool like GPG to generate your public/private keypair with a passphrase, publish it on a server if you wish and export the public and private keys as .ASC files. After that, you can follow the instructions you find all across the web to place these files in the root of your SD card and import the keys. Which you do by going to Private keys or Public keys in the menu shown above, hitting the menu button and selecting Import keys. And then you will discover that this does not work because no key file is found.
You see, for some bizarre reason Samsung chose not to use the onboard key management facilities of Android to manage their keys, instead opting to roll their own. To import the keys into the Samsung mail client, place your key files on your SD card in the directory
/opengpg/export
Yes, that is correct, export. Then, make sure your keyfiles have the correct name. They should be called
<your email address>_<your name as you filled it in in the mail account settings>_0x<the ID of your PGP keypair>_Private_Key.asc
and
<your email address>_<your name as you filled it in in the mail account settings>_0x<the ID of your PGP keypair>_Public_Key.asc
respectively for the private and public keys. If you use other names, the mail app will not find them. You can generate an example if you want: in the mail app, use the Create keys option and export the keys to see what the names look like. You’ll have to get the ID from your GPG tool.
After all that, you should be able to import your keys. Then use the Set default key option to choose a default keypair. You can either select to sign all your mails, or you can use the settings per mail to sign and/or encrypt. Don’t lose your passphrase, you have to fill it in every time you sign a mail!
Setting up keys to sign emails in Samsung’s Android email app