
In my previous post Starting with grails, I wrote a long story about creating a new application with grails. I introduced some plugins and gave some hints and tips about working with grails from a starter perspective. As I move on, I will write down other things I have done.
Some of the things you can find in this post are:
- Using yahoo ui grid for laying out the page
- Creating a second navigation menu
- Mail integration for the contact form
- Implement access control, so only known users can use the application.
Yahoo Grid
Laying out a page is not easy. Especially not when you want to facilitate resizing of all browsers. Why would you want to develop stylesheets yourself if you can get a good one for free. I decided to use yahoo grids to layout the base components of my pages. It fits very well with sitemesh and of course grails.
If you want to learn more about what yahoo grid is, check the following page. I personally like the cheatsheet they provided a lot.
Yahoo grids is all about stylesheets, you can link to the stylesheets located at yahoo servers. To do that add the following line to the main template. You can find the main template in grails-app/views/layouts/main.gsp
<link rel="stylesheet" type="text/css" href="http://yui.yahooapis.com/2.8.0r4/build/reset-fonts-grids/reset-fonts-grids.css/">
Than you need to think about the layout of your page. I want a page that uses the maximum space. In the header I want a logo and the navigation. The body consists of two columns, one for the main content and the other for messages, special actions using ajax controls, and other things I can think of.
The main layout items are in the maain.gsp that I mentioned before. The body element is split into two elements, one for the actual content using the sitemesh g:layoutBody. The other contains the flash message and flash error message. For these classes I included some styling in the web-app/css/main.css.
Adding a second menu
I also want a menu with items like about and contact. So we go back to the navigation plugin. Now I have create a new menu group called sitemenu. For now there are two controllers adding items to this menu, the Contact and About controller. Now we need to change the style of this menu, we make it float right and change some of the styling. To do this, we add the following lines to the main.css mentioned earlier.
#sitemenu .navigation li a { background-color: #fff }
#sitemenu .navigation li.navigation_active a { background-color: #fff; color:#555; text-decoration:underline}
#sitemenu .navigation li.navigation_active a:hover { background-color: #fff;}
#sitemenu .navigation li a:hover { background-color: #999; }
#sitemenu .navigation li a { color: #555; }
#sitemenu .navigation li a:hover { color: #555; text-decoration:underline}
#sitemenu .navigation li { border: 1px solid #fff; background-color: #fff }
The next code block shows the changed main.gsp, for now only the part containing the header
<div id="doc3">
  <div id="hd">
    <div id="sitemenu">
      <nav:render group="sitemenu"/>
    </div>
    <div id="grailsLogo" class="logo"><a href="http://grails.org"><img src="${resource(dir: 'images', file: 'grails_logo.png')}" alt="Grails" border="0"/></a></div>
    <div id="menu">
      <nav:render group="tabs"/>
      <nav:renderSubItems group="tabs"/>
    </div>
  </div>
  <div id="bd">
  </div>
  <div id="ft">
  </div>
</div>
That is step one in creating a better looking application. The following screendump gives you an idea where we are right now.
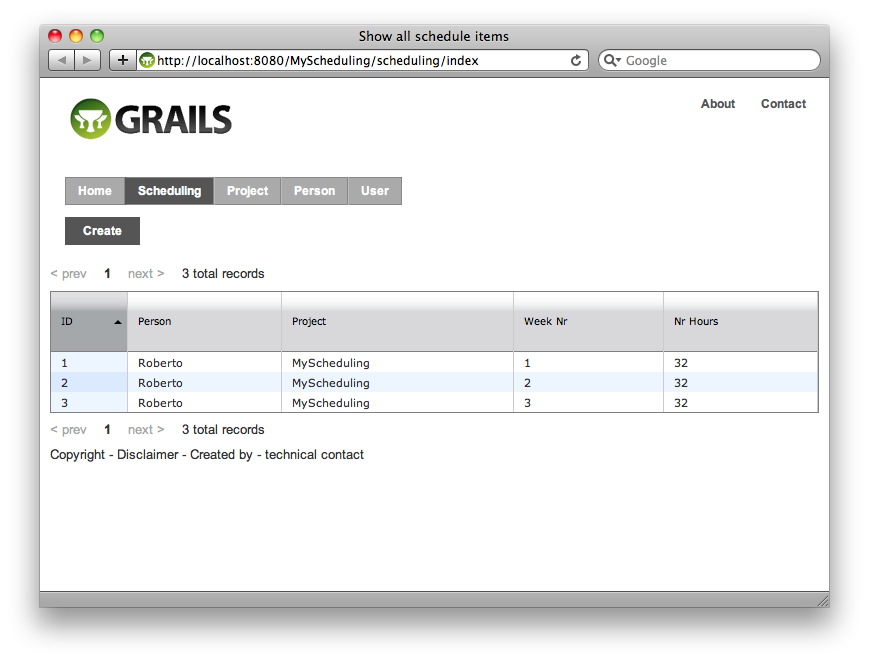
Next up is the create scheduling items screen.
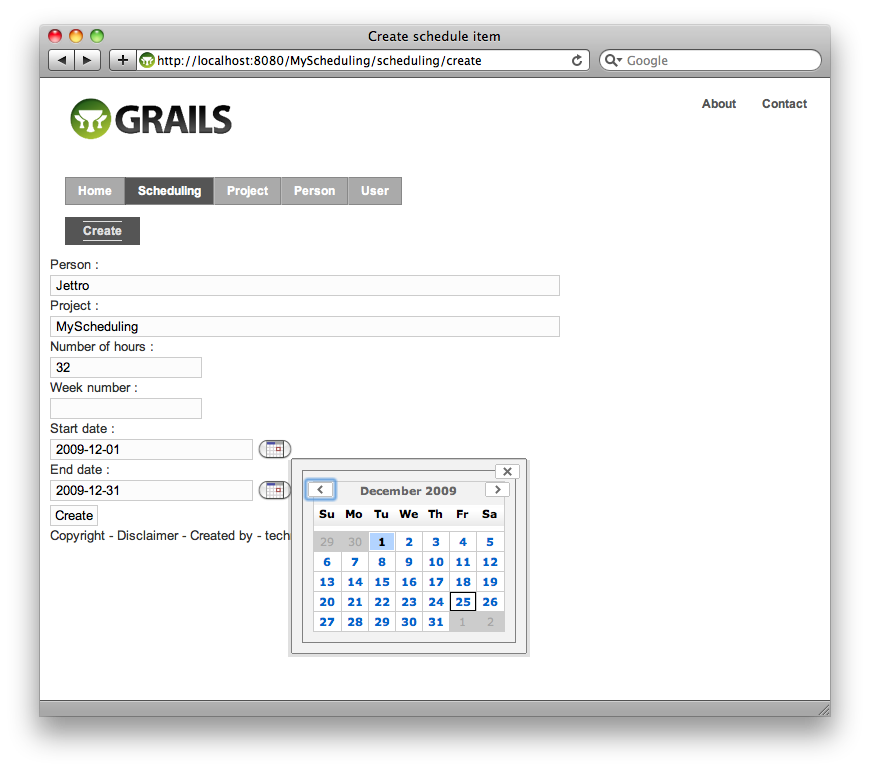
Improving form layout of create scheduling items screen
Let me state up front, this is not easy. I am not the king in stylesheets, so don’t take this as the best example. I had a hard time limiting the length of the autocomplete boxes. I ended up limiting the div surrounding the input box. For the date picker I had a simular problem. By default position elements left and top are not zero. Also a padding is not nice in this form. Therefore I added a style block into the html. Not ideal, you would want to have this in a central place, but I do not know how to do this. If someone has suggestions, please place a comment to this post.
The following screendump shows what it looks like right now with one of the date pickers popped open.
Adding logo
The grails logo is nice, but not what you want to have in your application. Changing it is very easy. Just open the main.gsp in the views/layout folder. Create a logo and probably a favicon.ico and put them in the web-app/images folder. Find the link in the header of the template with the shortcut icon. If you named the ico file the same you do not have to change a thing. For the logo you need to find the div with the id grailslogo. See how the function resources is used to create the src of the img tag.
If you do not know how to create an ico file, check this website: favicon.cc
Mail integration
The contact form can be used to send a mail to responsible users of the system. To be able to send the mail, we are going to use the mail plugin. Installing it is easy with the command:
grails install-plugin mail
Configuration of the plugin is done in the Config.groovy. You can set the mail.host and the default.from properties. The mail service is injected in the Controllers and can be injected in the services by declaring a mailService property. You can send messages inline by providing a closure with the properties. Another mechanism is by using a template or a view. When sending the mail from a service you do not have the current request. Then you can still use the views, do provide the absolute paths if you use the service to generate the mail. It is also possible to take the template from a plugin, check the page of the mail plugin.
In my example I am using the controller to send a mail and the template for an html mail. I also use a trick with system properties to prevent my password to be send to GIT. Let us focus on the configuration first. The following code block shows the configuration of mail using a gmail account. Check the System.getProperty usage for obtaining the userid and the password
grails {
    mail {
        host = "smtp.gmail.com"
        port = 465
        username = System.getProperty("gmail.userid") + "@gmail.com"
        password = System.getProperty("gmail.password")
        props = ["mail.smtp.auth":"true",
                 "mail.smtp.socketFactory.port":"465",
                 "mail.smtp.socketFactory.class":"javax.net.ssl.SSLSocketFactory",
                 "mail.smtp.socketFactory.fallback":"false"]
    }
}
In the contact/index.gsp I created a form with a few fields. The submit is send to the mail method of the ContactController. Like I said, the mailService is available to all controllers. The following code block shows how to send the mail.
    def mail = {
        if (params.yourname) {
            sendMail {
                to "jettro@gridshore.nl"
                subject "Contact Form"
                html g.render(template: "contactMailTemplate",
                        model:[remark:params.remark,yourname:params.yourname,yourmail:params.yourmail])
            }
            flash.message = "Thank you for your remark, will get back to you if desired!"
        } else {
            flash.error = "Could not send a message, no name!"
        }
        redirect (controller:"contact")
    }
Check the way to make an html mail using a template and model parameters. More examples are available at the plugins page. We use a template to generate the mail. Easy stuff or not? Remember from that grails introduction that you need to prepend a template with an “_”, so we create contact/_contactMailTemplate.gsp. The following code block shows this file.
<%@ page contentType="text/html" %>
<html>
<head>
  <title>Welcome Aboard</title>
  <style type="text/css">
  body {
    font-family: "Trebuchet MS"
  }
  </style>
</head>
<body>
<h1>Howdy!</h1>
<p>
  We have a remark from : <strong>${yourname}</strong> with <strong>${yourmail}</strong>
</p>
<p>
  ${remark}
</p>
</body>
</html>
Of course this is not the end of the line, we need to add form validation, maybe a better confirmation screen. You name it, but that is not making the mail integration harder. It will be the same.
Access control
There are multiple plugins to do authentication/authorization or access control. I have a history with the spring security project, therefore I will use the acegi or spring security plugin. I do have to warn you that this is not the easiest plugin available. But security is not easy. The plugin comes with some nice shortcuts to create the required classes. I am not going to be very thorough in my description of the plugin, since it is still kind of a beginners blog post.
Some things you should know about the security plugin:
- You can use a map, spring xml configurtation as well as annotations to configure security
- You need three domain classes: User, Role and RequestMap
- You can secure url patterns using the admin screens of your application.
Now let us start securing our application. First install the plugin. Then we generate the domain classes.
grails install-plugin acegi
grails create-auth-domains nl.gridshore.scheduling.User nl.gridshore.scheduling.Role nl.gridshore.scheduling.Requestmap
Now we start the application and nothing really changed since we have not secured anything yet. Next up is securing the creating of new Persons. This should only be possible by a user with admin rights. For now we are going to create three roles, the viewer, the admin and the sysadmin.
To be able to add roles, we need to add the Role controller. We also need the Requestmap controller. We already had the user controller.
Now you can use the following urls to add roles and Requestmap items. I have added some code to the bootstrap class. I did have a problem with the Requestmap items, they were not updated. I had to restart the container to make them actually work. During development you cannot recreate the database each time without loosing the items. Therefore you really need the Bootstrapper. The following lines of code create the roles as well as the Requestmap items.
def roleAdmin = new Role(authority:"ROLE_ADMIN",description:"admin")
roleAdmin.save()
def roleSysAdmin = new Role(authority:"ROLE_SYSADMIN",description:"sysadmin")
roleSysAdmin.save()

def securePerson = new Requestmap(url:"/person/**",configAttribute:"ROLE_ADMIN")
securePerson.save()
def secureProject = new Requestmap(url:"/project/**",configAttribute:"ROLE_ADMIN")
secureProject.save()
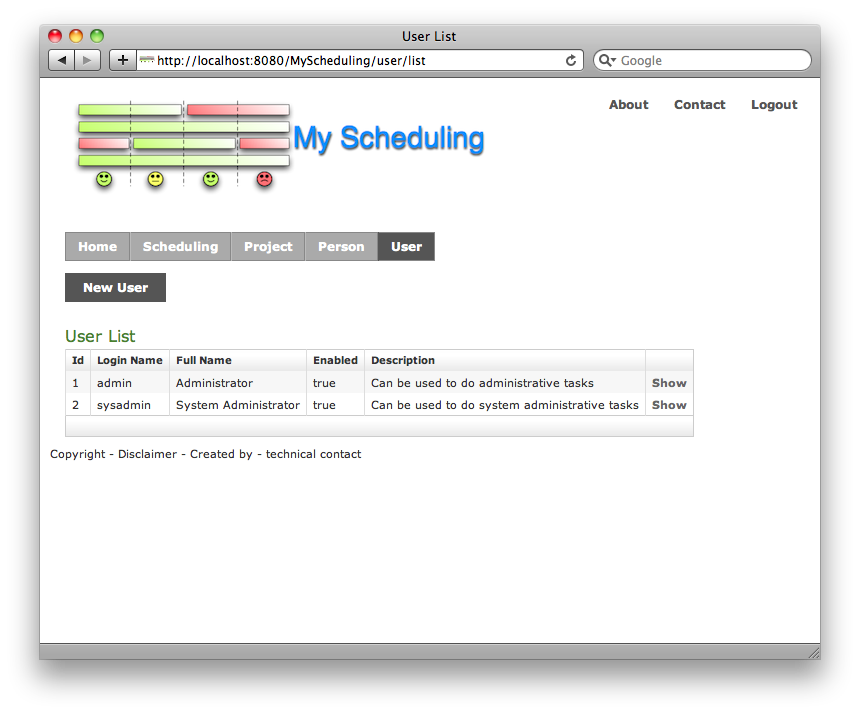
When adding a new user I came to the conclusion that the defautl scaffolding screens do not work appropriately. Therefore I create the screens and controller of the User and other security related classes using the special script.
grails generate-manager
Now everything works fine, I removed the navigation from the generated screens and the create user screen looks like the following image. Check the way the roles can be added to a user. Good stuff. My final steps are creating an admin user and a sysadmin user and securing the user, requestmap and role screens as well. That is all pretty straightforward.
Final remarks
We covered some big topics. Made the application look better. Implemented security using the spring security plugin. We also made a contact form using the mail plugin. In the next blogpost I will write about the search plugin and some optimizations to the current code base and maybe google charts.
If you have comments, tips, improvements feel free to contact me.